Let's sew some easy felt stuffed monsters for Halloween!
A few months ago, my son, who sees me so often when I am sewing and making plushies for Petit Loulou, came to ask me if he could also make a little stuffed monster. He is barely 4 years old and already wants to start making his own toys! Children are really amazing, they learn with a disconcerting ease. Just adapt a little bit to get within their reach, and they make real wonders.
I've put together a little Halloween DIY tutorial to make your own little stuffed monsters at home. It does not require any special material or advanced sewing skills and is really feasible for the whole family. Always stay near your children under 8 years old, because they will still have to handle scissors and needles. Sewing is an excellent creative activity to help your children develop their fine motor skills: it is very accessible, even to the youngest, requires concentration, precision, patience, and above all, gives such beautiful results that it is extremely rewarding!
Material you will need to make your Halloween monster plush toy
- 1 or 2 Felt sheets,
- Felt pen
- DMC embroidery thread,
- Stuffing
- Scissors
- Needle (the famous one).

How to make your Halloween monster plush toy
- Download and print the pattern.
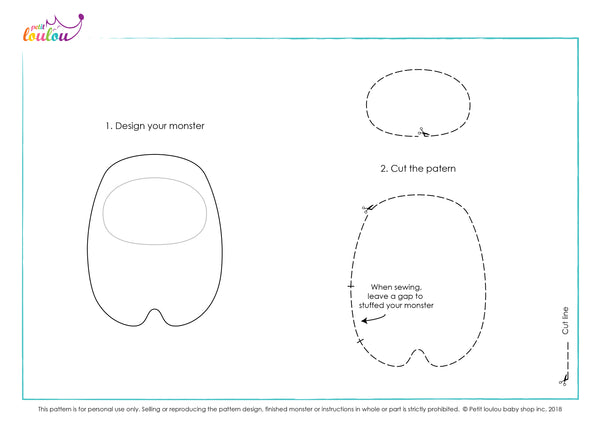
- Draw on the pattern to customize your little stuffed monster. If you are lacking ideas, you can have a look at my Monster gallery to find inspiration.
- Cut the pattern on the dotted line.
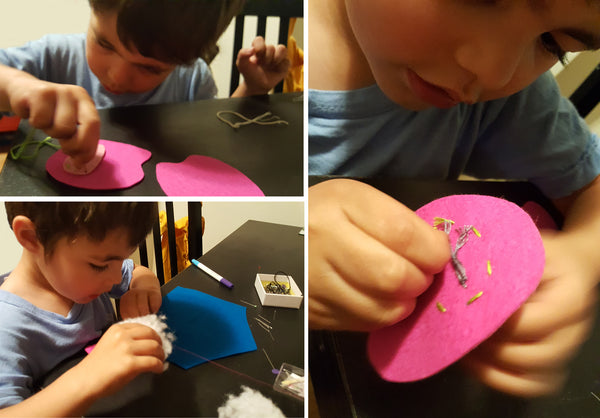
- Start by sewing the face of the little stuffed monster with the running stitch.
► To make things easier for my son, I showed him the first 3 stitches, I then used the felt pen to draw where he had to stitch to continue. Quickly he wanted to make marks on the felt himself. Imagine: he draws the point, takes the needle, pricks, puts the needle on the table, draws the next point ...
The Running Stitch
- Draw your Monster's eye(s), the nose(s), the mouth(s) (eh, it's Halloween!), on, next to, or half on the face (yes, it's always Halloween!) ... Everything is allowed ! Give free rein to your child's imagination.
- Embroider the details of your monster plushie's face using a back stitch. As before: we draw the point, we take the needle, we prick, we put the needle on the table, we draw the next point ...
The Back Stitch
- Now you have to sew the two sides together using the blanket stitch. Do not sew all around! We need to leave a little space, about 3 cm, to fill the stuffing into the stuffed monster. Normally, at this point you are used to the little routine of drawing the point on the felt, etc.
The Blanket Stitch
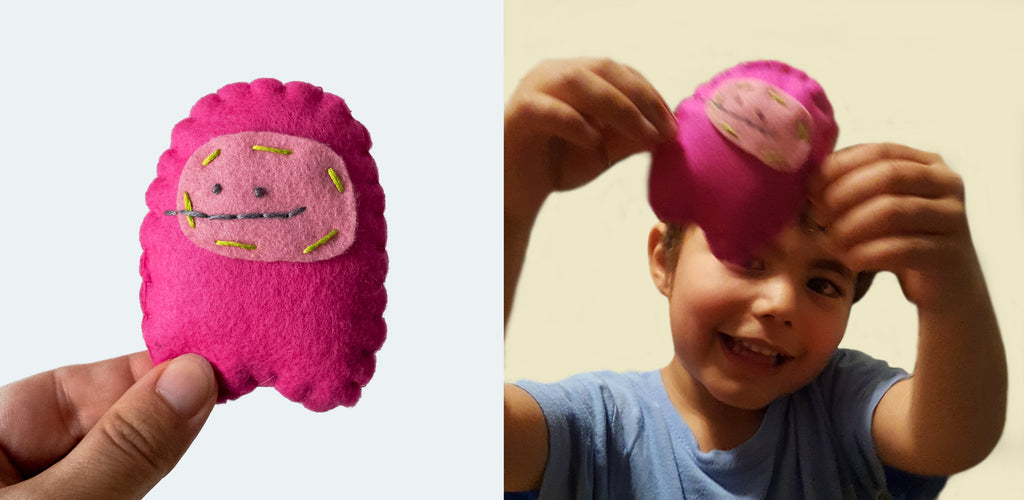
- Stuff your monster,
- Finish with the blanket stitch to close your opening and tie a knot... TADAAAAAA! Your little Halloween stuffed monster is done!
I know, the funny part is over, but I'm sure your child will find many games to engage with his new plush Monster. If you want to impress the gallery by making a small plush monster a little more elaborate, head over to Petit Loulou DIY sewing kits of Petit Loulou. Everything is ready for you: the soft fabric, the funny face, the thread, the needles, the stuffing, and the instruction booklet.
You prefer to give the monster without the toil? Check out the Petit Loulou shop, full of stuffed monsters are ready and available to join your children's games.
We had lots of fun making my son's felt monster! I hope you will too! Please let me know if you try it out!
For more of our favorite activities, explore our fine motor skills activities blog series!
And if you liked this post, don't forget to subscribe to our newsletter to keep up to date on all the latest Petit Loulou articles!
Happy sewing!